ChatGPT Plugin Setup
Important: Custom connectors require a ChatGPT Plus subscription (no Bocconi / free accounts).
Step-by-step Guide
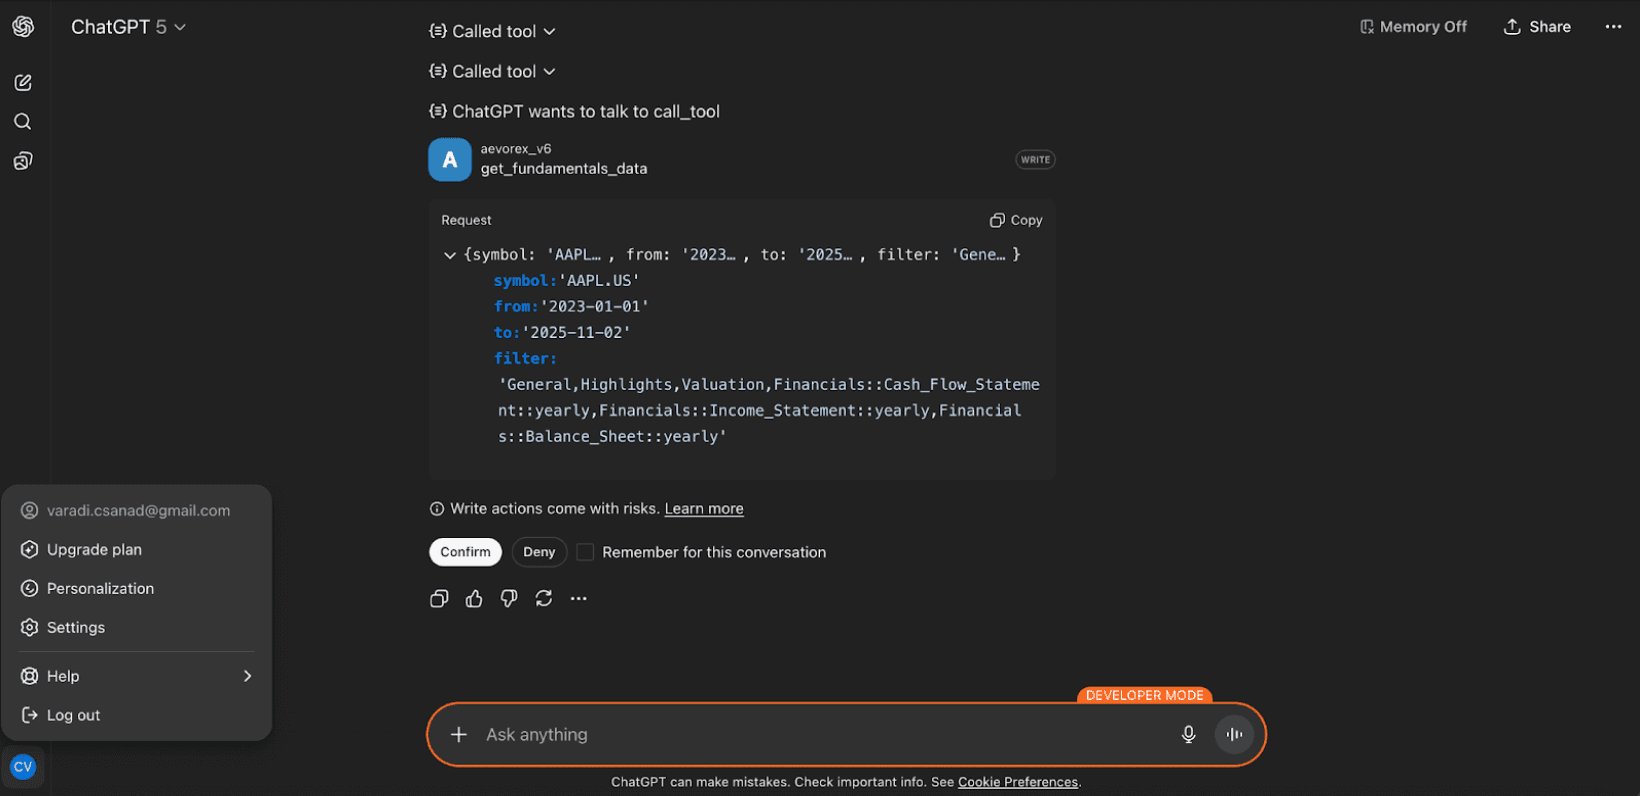
Step 1: ChatGPT Main Interface
Open ChatGPT (Plus) and verify that you can access the main workspace.
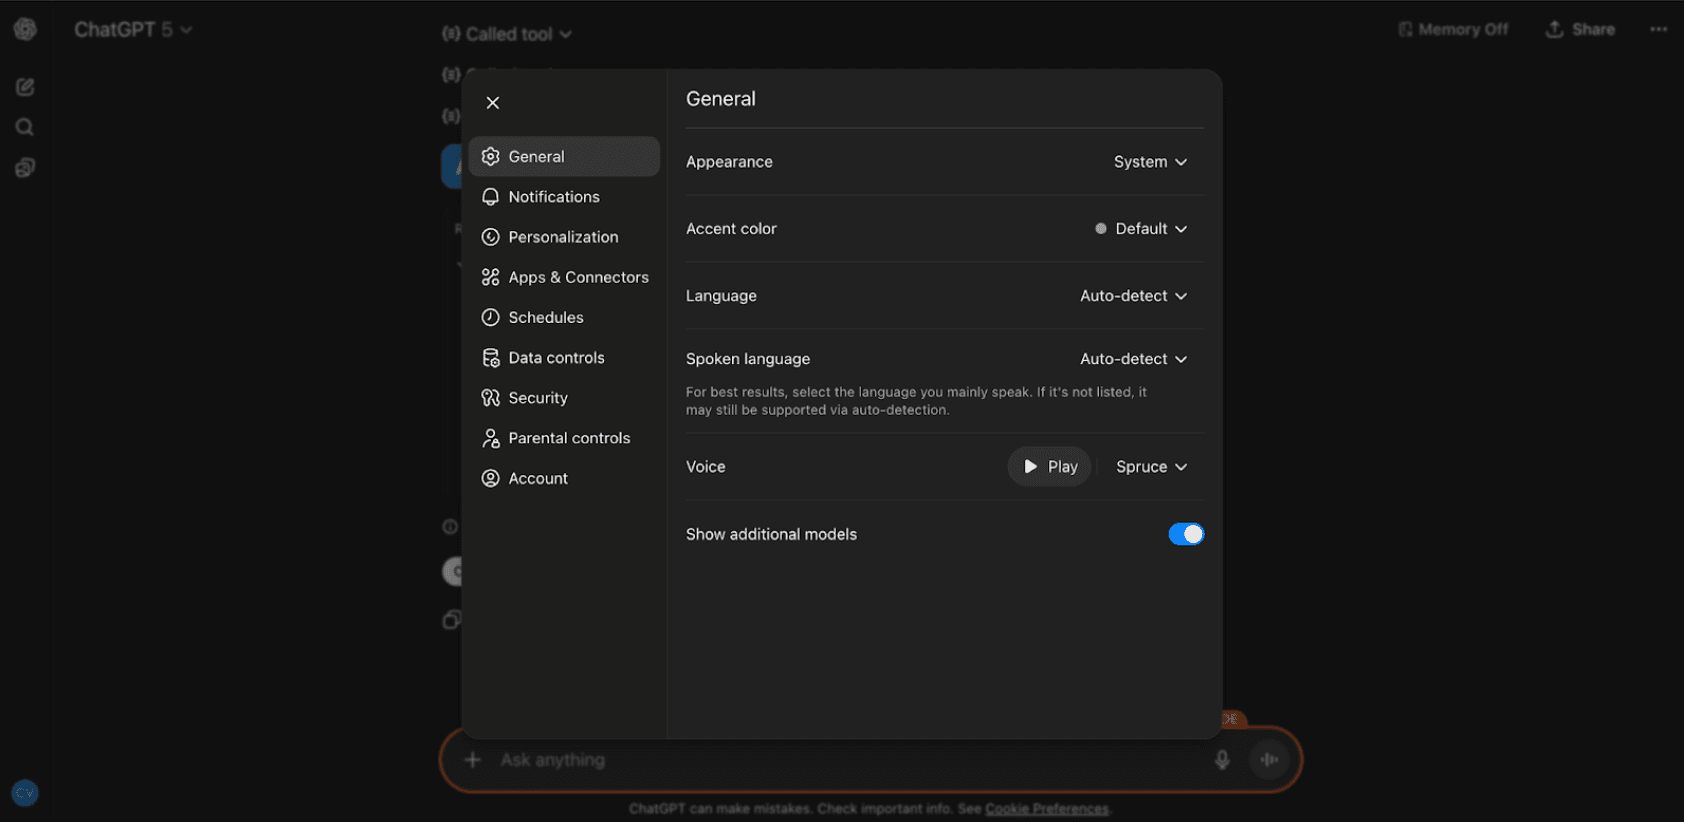
Step 2: Click on Profile
Click your profile avatar to access settings.
Step 3: Go to Connectors
Navigate to the Apps & Connectors section from the sidebar.
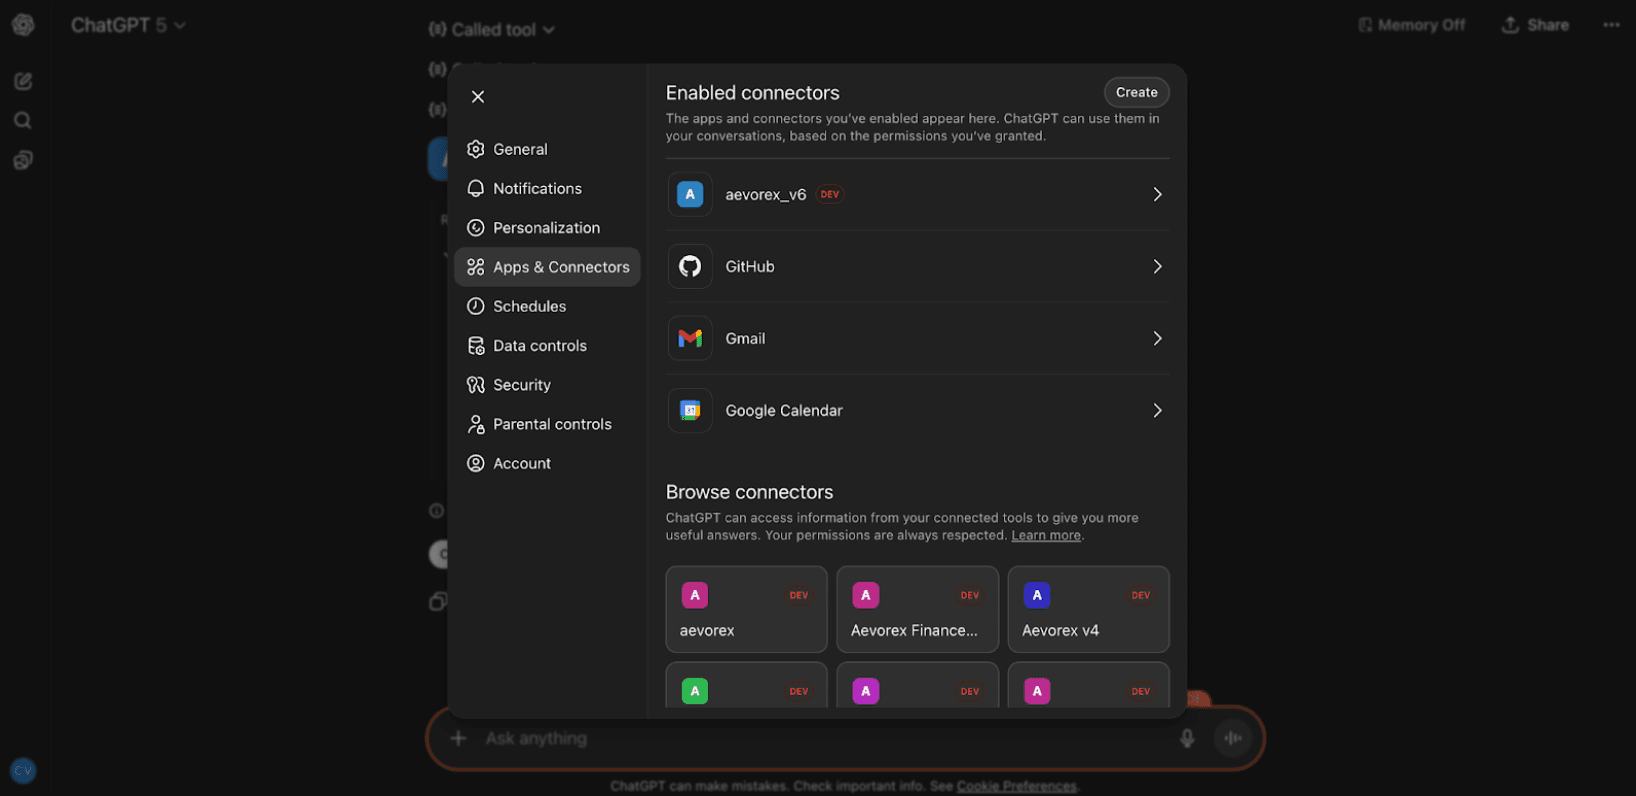
Step 4: Browse Connectors
Open the Connectors page and scroll to Advanced settings.
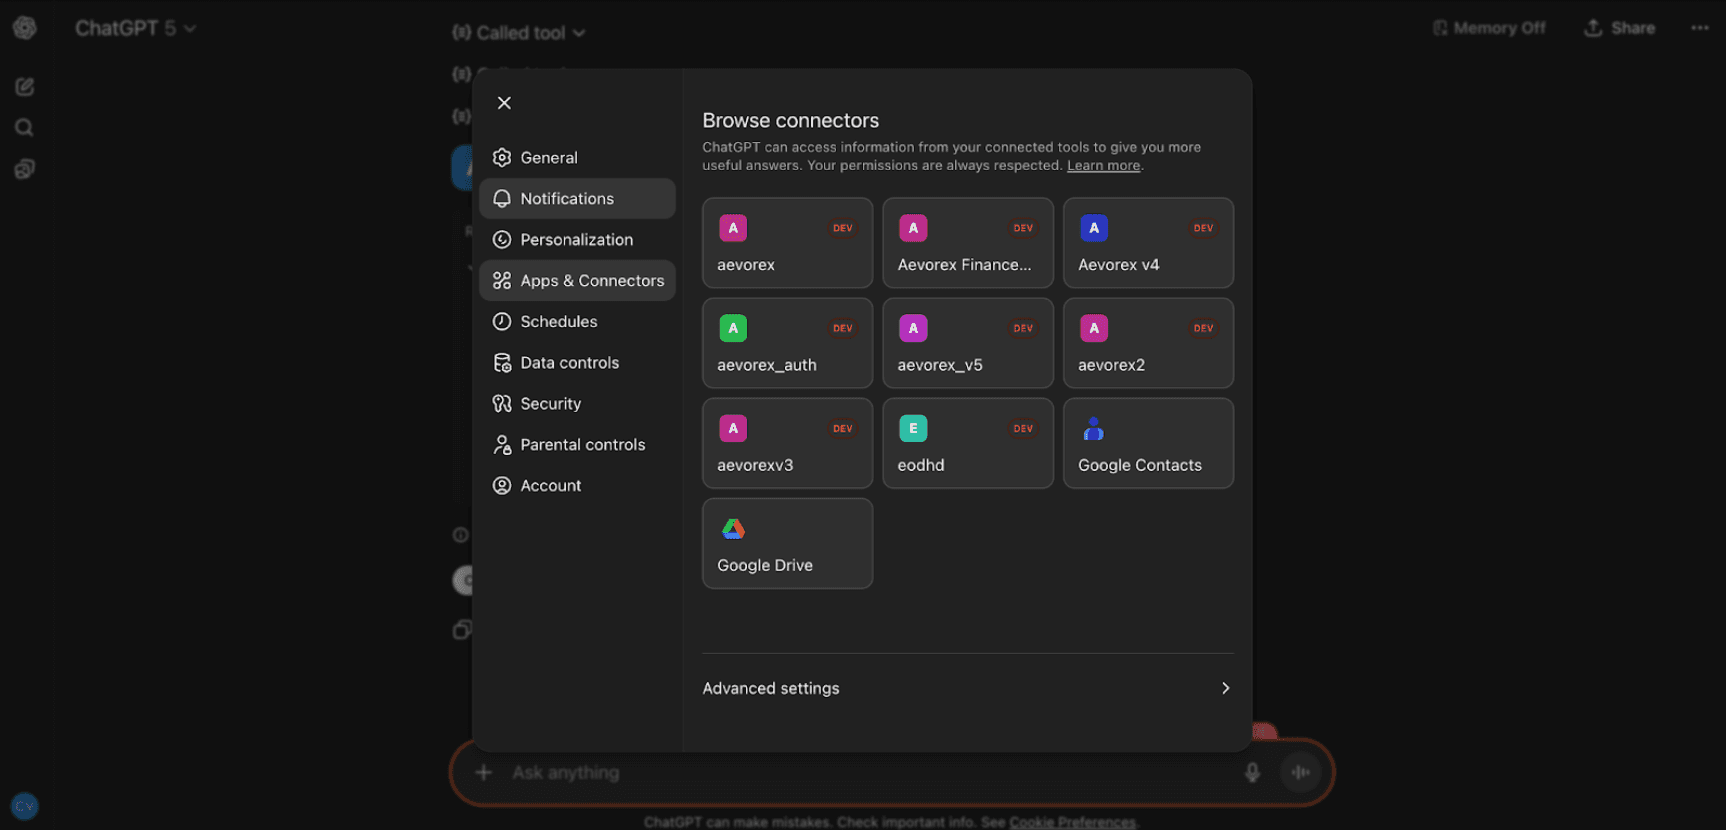
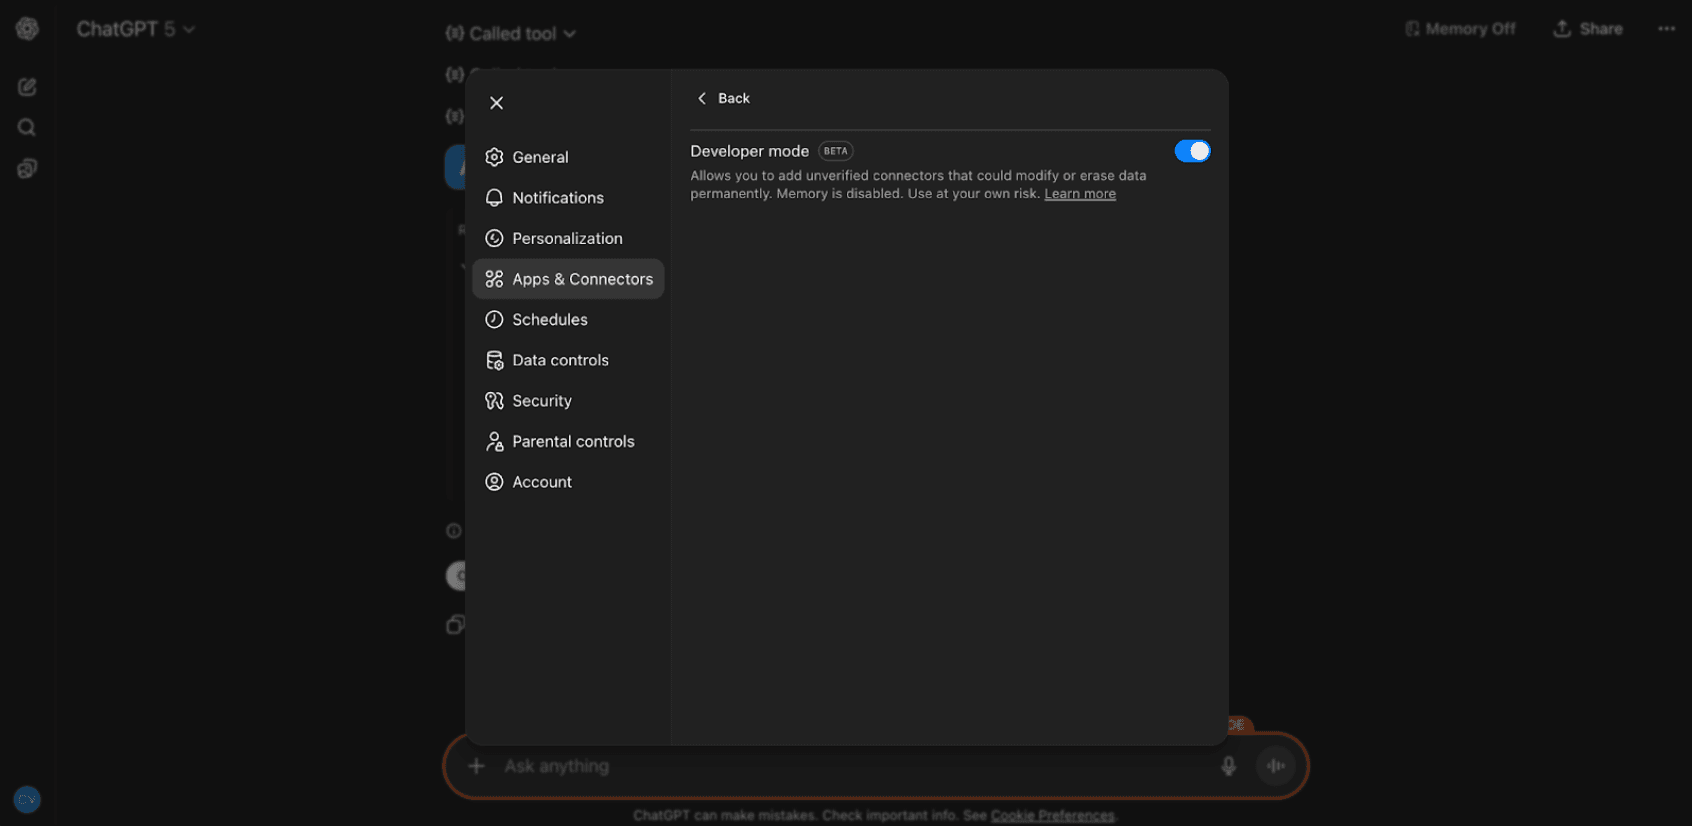
Step 5: Enable Developer Mode
Inside Advanced settings, enable Developer mode to allow custom connectors.
Step 6: Return to Connectors
Go back to the Connectors page and click Create.

Step 7: Create Custom Connector
Fill in the details — Name: "Aevorex", URL: https://api.aevorex.com/api/v1/mcp?apikey=demo.
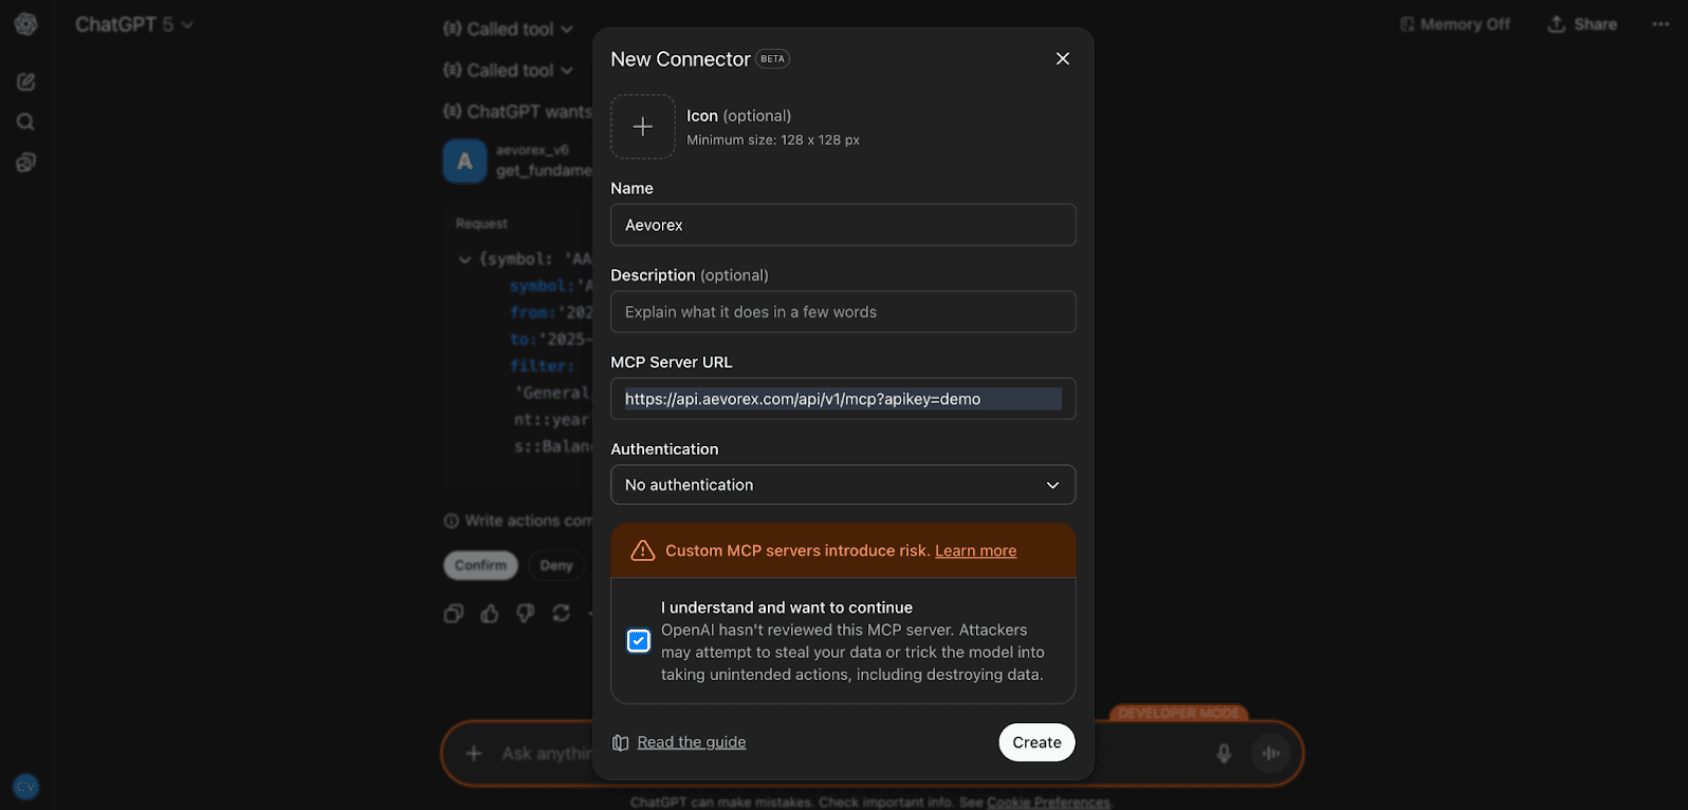
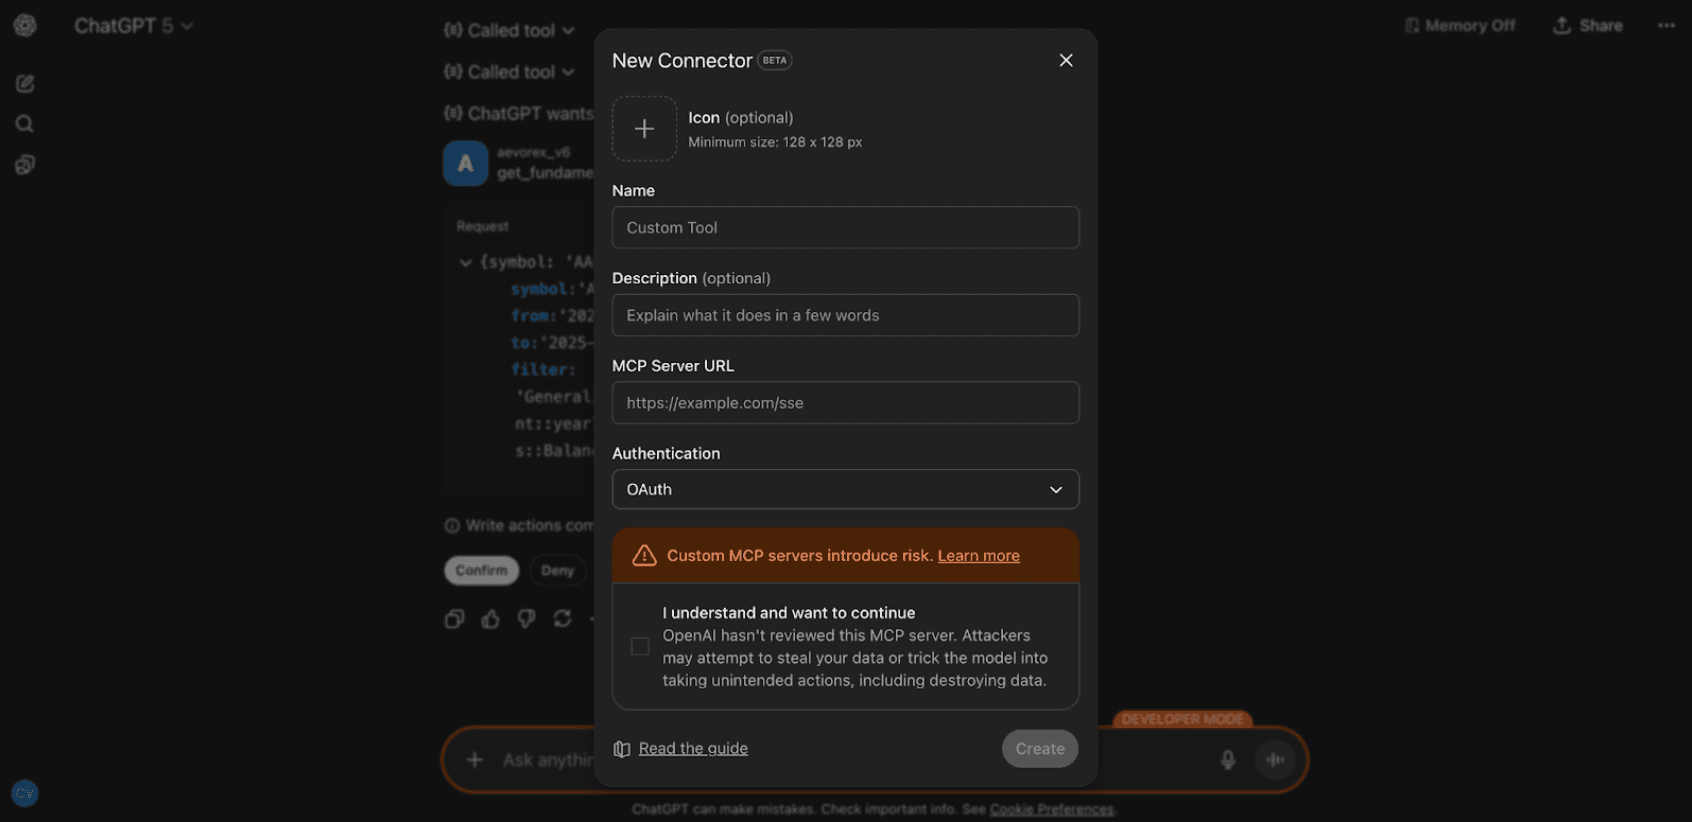
Step 8: Set Authentication to None
Change authentication from OAuth to "No authentication" (Aevorex handles auth internally).
Step 9: Connector Created
You should now see the Aevorex connector with all actions listed.

Setup Summary
Profile → Connectors → Enable Developer Mode → Create custom connector → Name: Aevorex → URL: https://api.aevorex.com/api/v1/mcp?apikey=demo → Auth: None → Create.
Requirements: ChatGPT Plus subscription.